Fix defaultuser0 Issue in 5 Steps
![]() 3 min. read
3 min. read
![]() Published on
Published on
Share this article
Improve this guide
Read our disclosure page to find out how can you help Windows Report sustain the editorial team. Read more
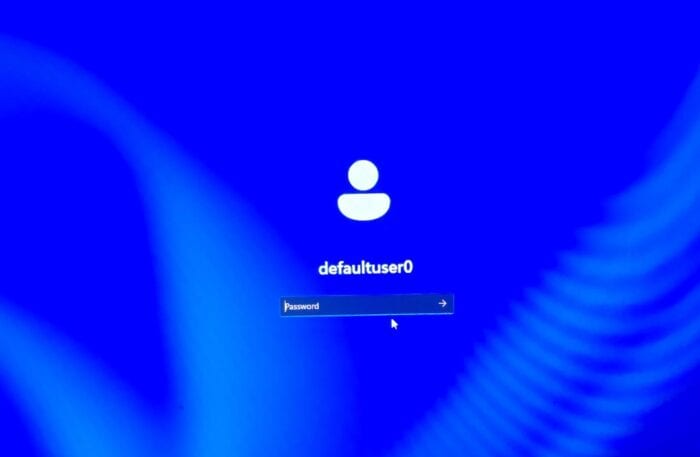

If you’re encountering the defaultuser0 login issue on Windows 11, you’re not alone. This problem typically arises when the Windows setup process doesn’t complete correctly, leaving behind a temporary account named defaultuser0. This account lacks a password, rendering it inaccessible and preventing you from creating or accessing your intended user profile.(JustAnswer, DiskPart)
🔍 What Is defaultuser0?
The defaultuser0 account is a system-generated profile created during the Windows Out-of-Box Experience (OOBE). It’s designed to be a placeholder and should automatically be removed once the setup process completes and a new user account is created. However, if the setup is interrupted—due to a power failure, system crash, or other issues—the defaultuser0 account may persist, leading to login problems.
🛠️ How to Fix the defaultuser0 Login Issue
1. Restart Your Computer
Sometimes, a simple restart can resolve the issue. If the setup process resumes correctly, it may allow you to create a new user account.(PassFab, Neowin)
Steps:
- Press and hold the Power button to turn off your PC.
- Wait a few seconds, then turn it back on.
- Check if the setup process resumes, allowing you to create a new user account.
2. Activate the Built-in Administrator Account
If restarting doesn’t help, you can activate the hidden Administrator account to create a new user profile.(Neowin)
Steps:
- On the login screen, press and hold the Shift key, then click on Power > Restart.
- After your PC restarts, select Troubleshoot > Advanced Options > Startup Settings > Restart.
- Once it restarts again, press F6 to enter Safe Mode with Command Prompt.
- In the Command Prompt window, type:(Neowin, DiskPart, EaseUS)
net user administrator /active:yes
- Press Enter, then restart your PC.
- Log in using the newly activated Administrator account.
- Create a new user account with administrative privileges.
3. Delete the defaultuser0 Account
After creating a new user account, you can remove the problematic defaultuser0 account.(PassFab)
Steps:
- Log in with your new user account.
- Press Win + R, type
lusrmgr.msc, and press Enter. - In the Local Users and Groups window, click on Users.
- Right-click on
defaultuser0and select Delete.(DiskPart, Reddit)
Note: The lusrmgr.msc utility is not available in Windows 11 Home edition. In that case, use the Command Prompt:
- Open Command Prompt as Administrator.
- Type:(DiskPart, es.easeus.com)
net user defaultuser0 /delete
- Press Enter.
4. Perform a System Reset
If the above methods don’t resolve the issue, performing a system reset can help. Note: This will remove all personal files and applications.
Steps:
- On the login screen, press and hold the Shift key, then click on Power > Restart.
- After your PC restarts, select Troubleshoot > Reset this PC > Remove everything.
- Follow the on-screen instructions to complete the reset.(Neowin, PassFab)
5. Use Third-Party Tools
If you’re unable to resolve the issue using the above methods, third-party tools like EaseUS Partition Master or AOMEI Partition Assistant can help reset or remove the defaultuser0 account. These tools allow you to create a bootable USB drive to manage user accounts and reset passwords. (EaseUS)
🧠 Additional Tips
- Prevent Future Issues: Ensure that the Windows setup process completes without interruptions. Avoid forcefully shutting down your PC during setup.(Microsoft Answers)
- Backup Important Data: Regularly back up your data to prevent loss in case of system errors.
- Keep Your System Updated: Install the latest Windows updates to benefit from security patches and bug fixes.
By following these steps, you should be able to resolve the defaultuser0 login issue and regain access to your Windows 11 system. If you need further assistance or have additional questions, feel free to ask!


User forum
0 messages